In this comprehensive guide, you will learn how to French braid your hair step-by-step. The French braid is not only a stunning and elegant hairstyle but also incredibly practical for workouts, running, or daily activities since it keeps your hair securely out of your face. Whether you choose a single braid down the back or a pair of double braids, this classic, timeless style is perfect for second- or third-day hair to refresh your look with minimal effort.
1. Gather Your Supplies
Before starting your French braid, it’s essential to have the right tools at hand. Here’s what you’ll need:
- A rat-tail comb for sectioning and precision
- A small hair elastic to secure the braid
- Three clear elastics for additional hold
- A mirror to ensure even braiding and neat sections
2. Sectioning
Sectioning is the foundation of a successful French braid. Divide your hair into four sections – two on the left and two on the right. Start by taking a one-inch section from the front hairline, then split this into three smaller strands. Set aside small strands from each section. The back sections should be slightly larger, about an inch wider than the front. Practice makes perfect—it may take a few attempts to get your sections just right, but it becomes quicker with experience.
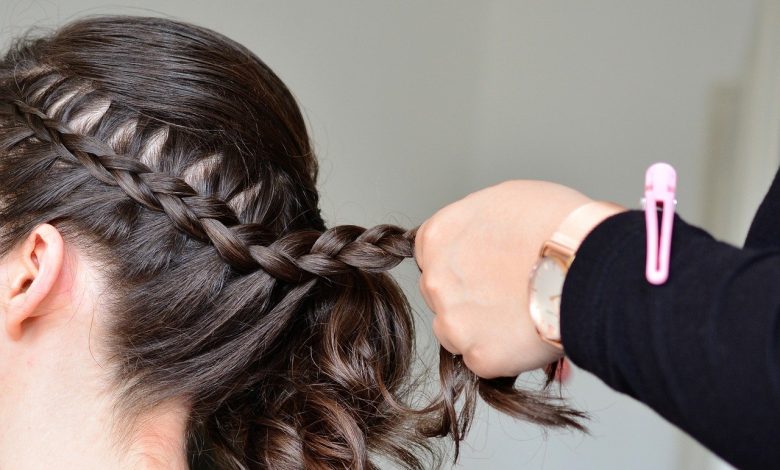
3. The First Braid
Begin braiding by taking the right side section and weaving a traditional three-strand braid all the way to the end. Start slowly, especially if you’re new to braiding, to ensure accuracy and smoothness. Secure this braid with a clear elastic. Next, gather the front sections and braid them together to the end, fastening with a small hair elastic.
4. Finishing the First Side
Once the first side is complete, you should see two small braids protruding. Carefully fold one braid over the center braid, tucking the end underneath itself, then repeat with the other. Each section overlaps the next, beginning with the left over the middle and then the right, creating an accordion fan effect when flipped. Use a mirror to monitor your progress for a flawless finish before securing the sections.
5. Securing the First Side
This step requires patience and precision. Using your rat-tail comb or a fine-toothed comb, hold the ends of the plaits firmly and gently pull the strands taut. Then weave the small strand under itself and over its neighbor twice before tucking it securely. Adjust the tension as needed to keep the braid tight and neat. Continue this process until all sections are held with elastics. Finally, gather the hair at the nape into a ponytail.
6. Second Side Braids
The braids on the left side are straightforward. Begin by braiding the two front sections together to the ends and secure with an elastic. Then, braid the other sections sequentially, crossing the left strand over the middle, then the right over the middle. Repeat on both sides for symmetry. After completing both sides, flip to the front and tighten elastics as needed for a polished final look.
7. Final Touches
Flip your hair back to the front and check the overall shape and neatness. Tuck the braid ends underneath each section using the accordion fan folding method demonstrated earlier. Gather all your hair loosely at the nape and twist it into a bun, securing with the rat-tail comb by sliding it through the bun’s base. For long-lasting hold, finish with a light mist of hairspray. With practice, the French braid becomes a chic, versatile hairstyle perfect for any occasion. Stay tuned for our next guide on how to transform your French braid into a stunning braided crown.
French braids are incredibly versatile and suit all hair types, making them popular for casual and formal occasions alike. Whether you prefer a loose, bohemian look or a tight, polished braid, this hairstyle enhances your overall appearance while keeping hair manageable. They also protect hair from damage by reducing friction and tangling. With a little patience and the right technique, mastering the French braid can elevate your hairstyling repertoire and give you a timeless look that never goes out of style.
FAQs
There isn’t a direct French word for “French braid.” Common phrases include “Jolie coupe de cheveux” meaning a pretty haircut. More specifically, the braid is sometimes called “chignon” or “tresses.” Another term, “coiffure à l’anglaise,” translates as “English hairstyle,” though this can also refer to braids.
The term “French braid” has roots linked to 18th-century France during Louis XVI’s reign, though it was not originally called that. The name was popularized by the English author Henry Fielding, who described dresses with braided strings. The style was brought to the U.S. during World War II by French singer and actress Désirée Clary. Sometimes, the braid is colloquially referred to as a “five-strand braid.”
To create a French braid, divide your hair into three strands instead of two, starting from the crown. Gradually add hair from the sides as you braid down, weaving the sections together. Once all hair is incorporated, secure the end with an elastic band. This technique differs from pigtails or Dutch braids by the added strands woven into the braid.
Absolutely! French braids can be styled as half-up or full-updos, offering versatile options for casual or formal looks. This style keeps your hair neat while enhancing your overall appearance.