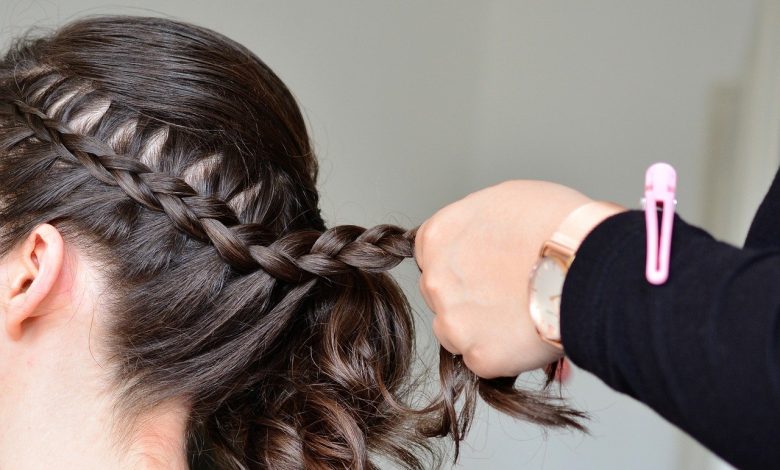
In this article, you will learn how to French braid your hair. A French braid is a beautiful hairstyle and practical for working out, running, or whatever you are doing since it keeps your hair out of your face. The French braid can be done as a double braid or a single braid down the back of your head. This braid is so classic and timeless that you must try it if you have a second or third-day hair.
1. Gather your supplies
Before we get started, let’s talk equipment. You will need a rat-tail comb.
- A small hair elastic
- Three clear elastics
- It’s also helpful to have a mirror
2. Sectioning
The key to successfully braiding your hair is sectioning. You’ll want four sections total two on the left, two on the right. Take a one-inch section from the front of your hairline, then split that section into three smaller sections.
Grab a small strand from each section and set it aside. The back sections should be larger than the front sections, but not by much, maybe an inch between them? It’s all about trial and error, but once you get the hang of it, it goes pretty fast.
3. The first braid
Now that your sections are set braid away. Start with the section on the right side and weave a standard three-strand braid to the end. It helps if you go slowly to start, especially if this is your first time.
When it’s finished, secure with a clear elastic. To make the next braid, pick up each front section in turn and plait them together down to the end. Secure with a small hair elastic.
4. Finishing the first side
When the first side is finished, you should have two tiny braids sticking out. Grab one of them and fold it over the top of the center braid, tucking the end underneath itself. Now repeat with the other front strand. Each section should now be folded back on top of its neighbor.
This is where you need to watch what’s going on in that mirror. Fold down each section like this: The first cross is left over the middle, then right. When both sides are correctly done, it will look beautiful: Done correctly, your hair should look like an accordion fan when you flip it over. Next, we’ll secure those puppies.
5. Securing the first side
This is the trickiest part. If you’ve got a rat-tail comb, now’s the time to use it. A fine-toothed comb would also work, but I like the rat-tail because it’s easier to grip. To secure each section, hold the end of one plait in place with your thumb and slide your fingers down until they’re gripping both loose strands.
Pull up gently on these new sections so that they are taut. Now use your other hand to feed the small strand under itself, over its neighbor, and under again, so it circles itself twice before being tucked into place. You may need to pull up again once you have tautened the strand so that its neighbor is also taut. Repeat until all plaits are secured with an elastic. Then pull out your rat-tail comb and gather the hair at the nape of your neck into a ponytail.
6. Second side braids
These parts are easy! Start by grabbing two front sections from the left side and braid them together down to the end. Secure with an elastic when it’s finished. Next, pick up each section in turn and braid it away from you down to the end, left over middle, then right over the middle. Repeat on the other side without skipping a beat! When both sides are finished, flip back over to the front and secure with elastics.
7. Final touches
When you flip back over, your hair should look great. Tuck the ends of both braids underneath each side, folding each section up in an accordion fan just like before. Now fold it back down into place and pull out the rat-tail comb again. This time, gather all of your hair loosely together at your nape into a ponytail and slide the rat-tail through the base to form a loose bun. Then use some hairspray if desired. That’s pretty much it. Weave and plait and braid your way to a lovely head of hair. We’ll show you how to wrap this baby up for a beautiful, braided crown in our next installment.
FAQs.
- What do you call French-braid hairstyle in French?
There’s no specific word for it. Usually, we use “Jolie coupe de Cheveux” (a pretty haircut). But if we want to be more specific and talk about the braid itself and not the style, we will say “chignon,” OR we could go fancy with “coiffure à l’anglaise” (English hairstyle) or also “tresses.”
- Where does the name French-braid come from?
The word ‘French-braid’ comes from France, but it has nothing to do with our country. One of the first uses was in 18th century France, during the reign of Louis XVI, but it was not called a French braid. It was named a ‘French braid’ by the 18th-century author Henry Fielding, about the style of dress worn by some women which “included a frieze gown tied up on the outside with strings and braided in the front.” It was brought to the United States during the Second World War by French actress and singer Désirée Clary (1777-1860).
Sometimes, the braid is called a ‘five-strand braid.’
How do you make a French-braid hairstyle?
To make a French braid, you need to separate your hair in comb sections of three strands instead of two (like it’s done for pigtails or Dutch braid) and then braiding. If needed, use an elastic band to secure the end at the bottom of your head.
- Can I wear my hair up with a French braid?
Yes, definitely. You can wear your hair half up or all up with a French braid to half-up French braid styles.